Create a Sales Post with a Single Product
With Post Office, it is easy to create and schedule a Sales post on Facebook. Our robot PO ensures that communication with your customers runs smoothly. This article goes through how to step-by-step create a Sales post with a single product.
If you need help creating a Sales post with product variants, see more here.
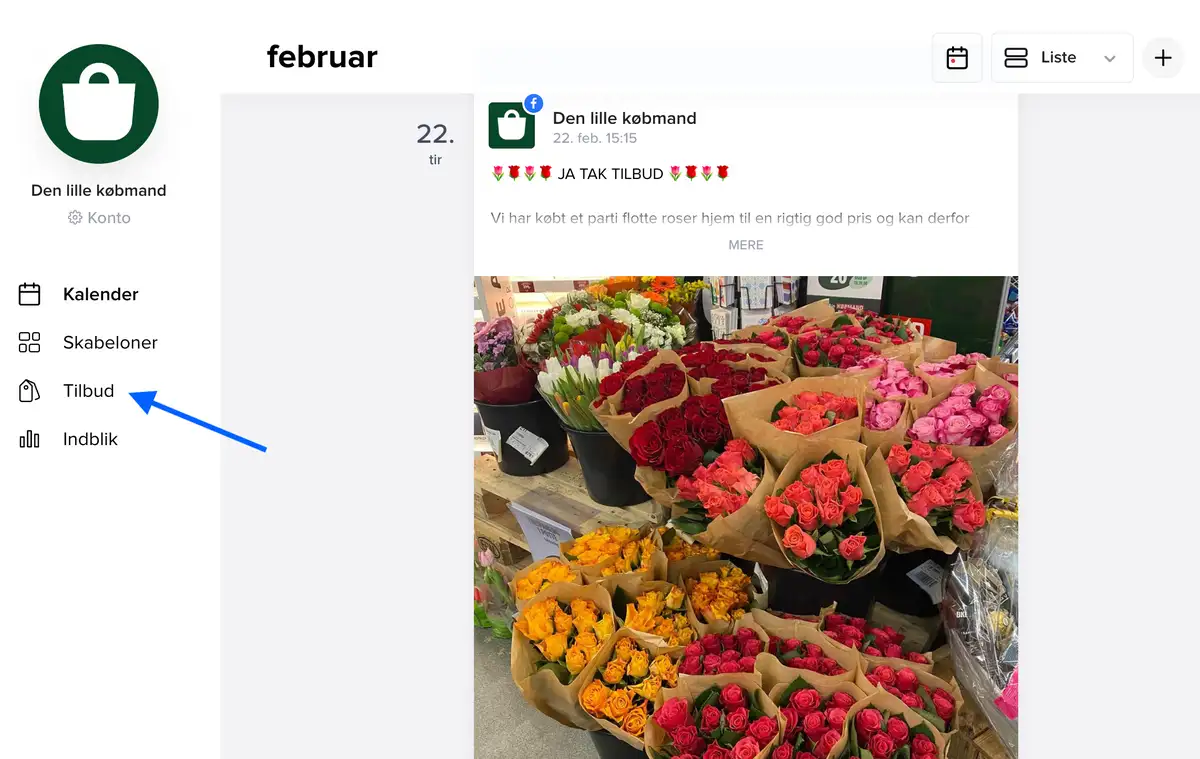
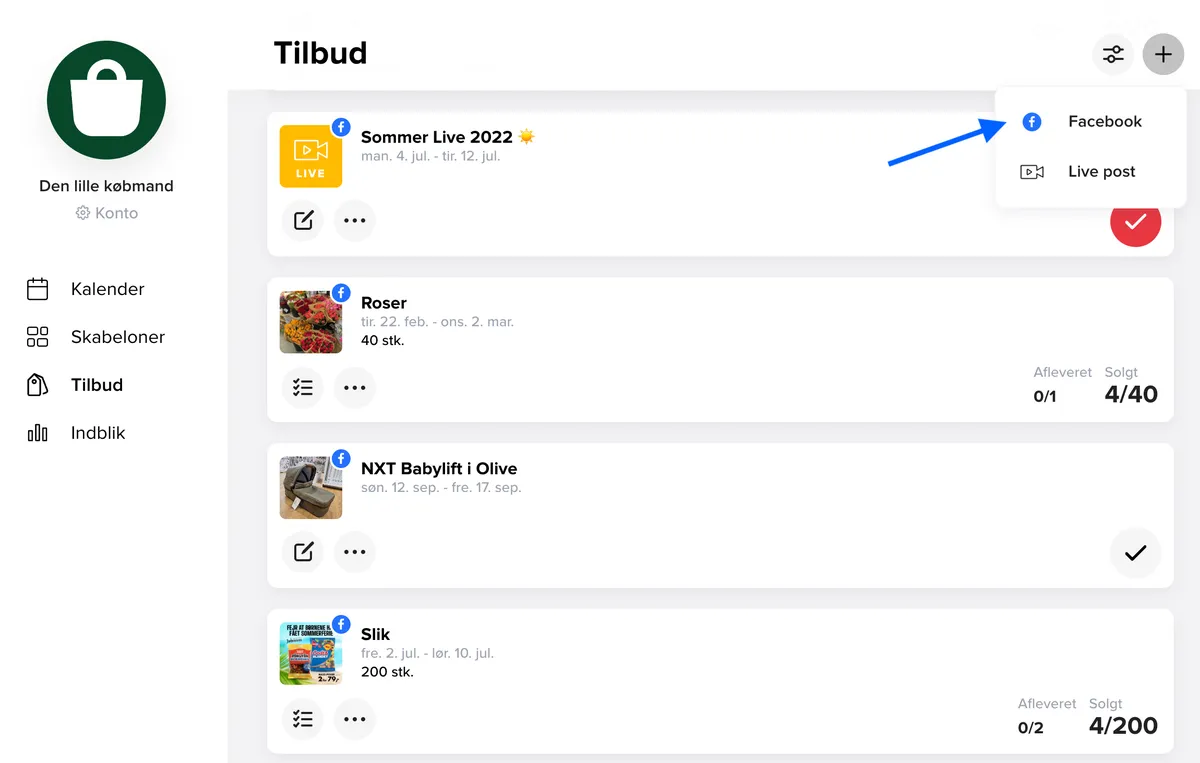
- 1Open Post Office and go to Sales.
- 2Press ➕ in the top right corner and select Facebook.
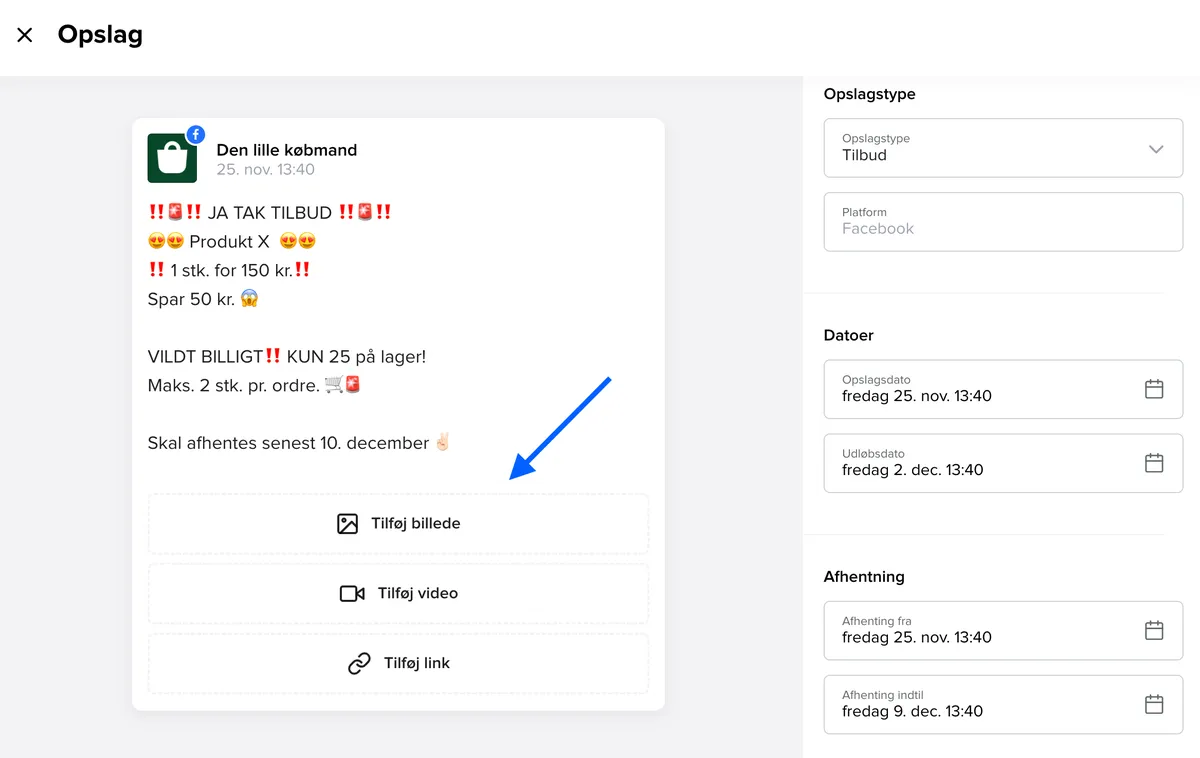
- 3Add the desired text to the post. A footer is automatically inserted at the end of the post text with info for customers on how they can order goods.
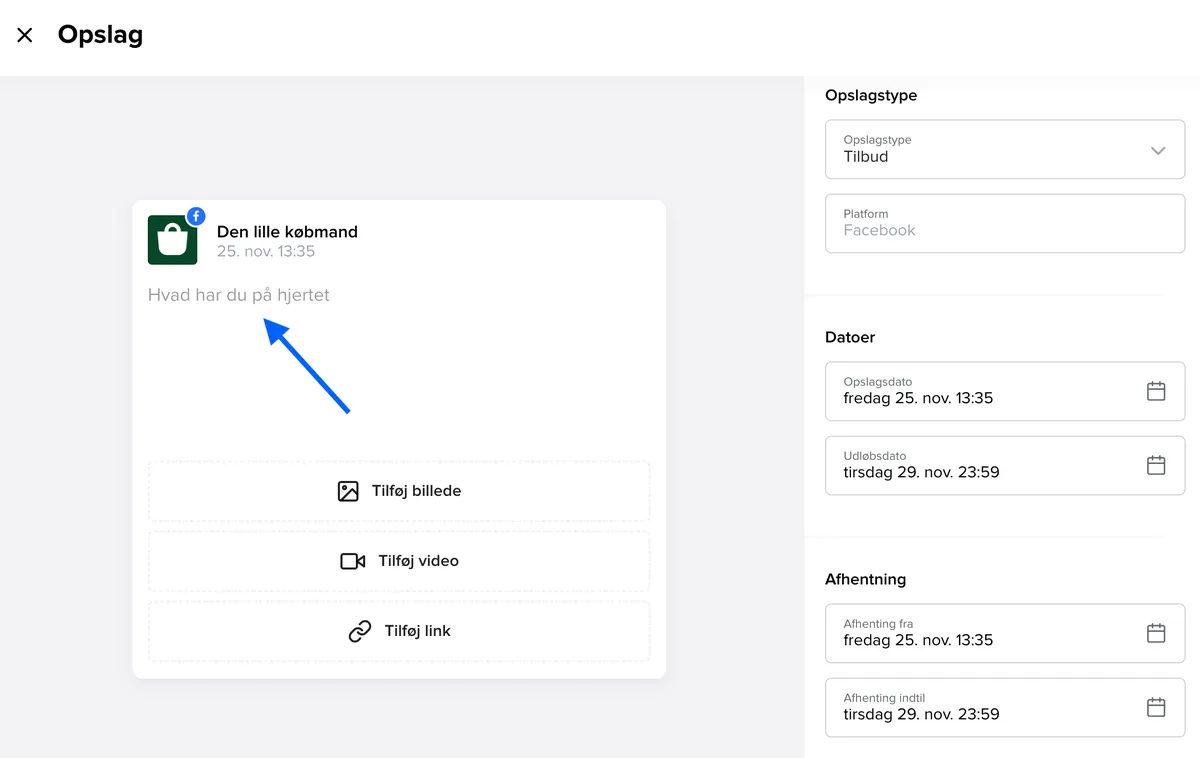
- 4Add an image, video, or link to the product.
- 5Get help editing your image and adding graphics here.
- 6The post type is automatically set to ‘Offer’. If you want to create an offer with multiple product variants, see more here. The platform for Sales posts is automatically set to Facebook.
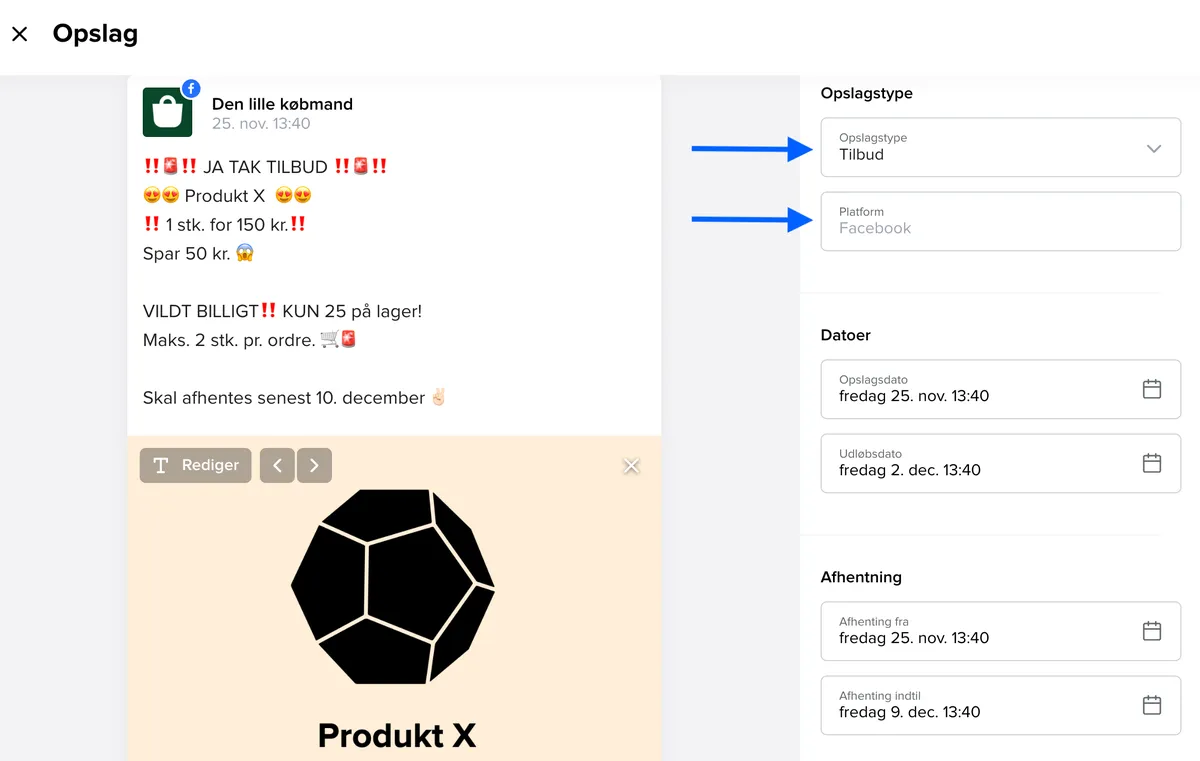
- 7Choose dates for the Sales post:
Post Date
Choose the time the post should be published.
Expiry Date
Choose a time when your Sales post is no longer valid. After this, it will no longer be possible for your customers to order the offer via the post.
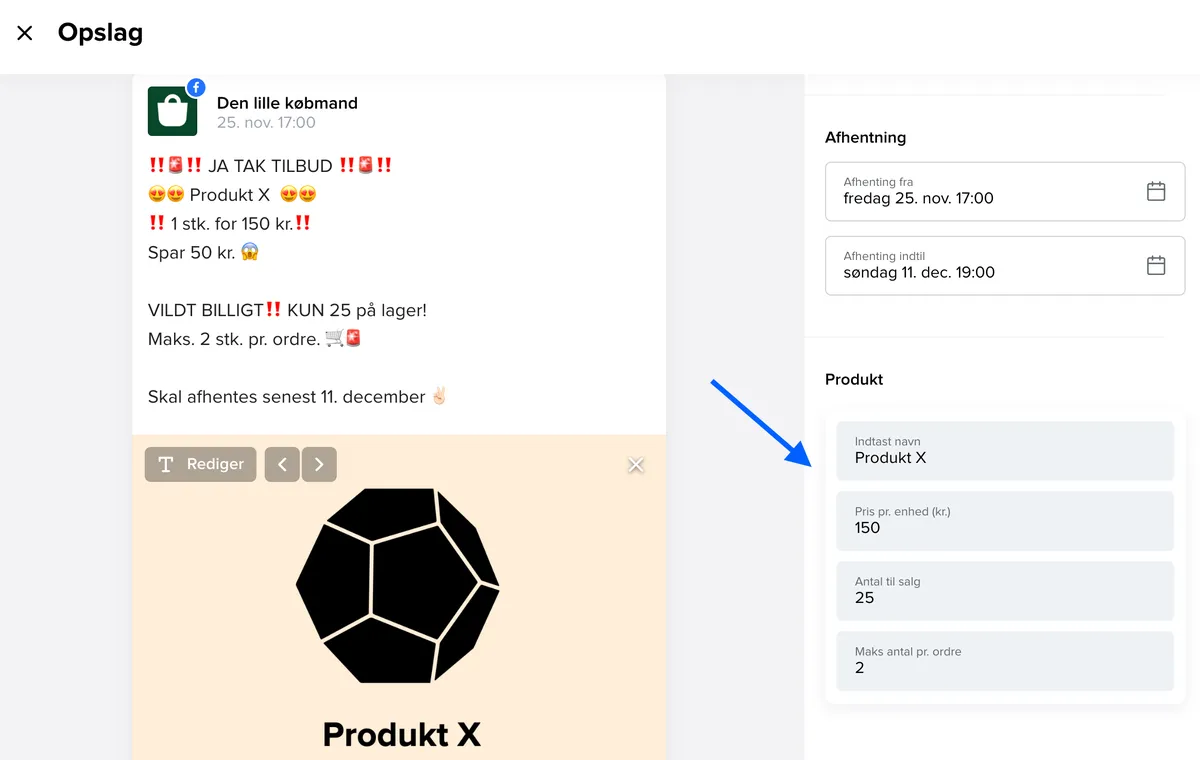
Pickup
When is it possible for your customers to pick up their ordered goods in the store?

- 8Enter product information:
Name
What is the name of your item? For example, “CK One Eau de Toilette 50 ml”.
Price per unit
The price the customer can buy 1 piece of the item for.
Quantity for sale
How many pieces are you selling of this item?
Max. quantity per order
Specify how many pieces each customer can buy at most.
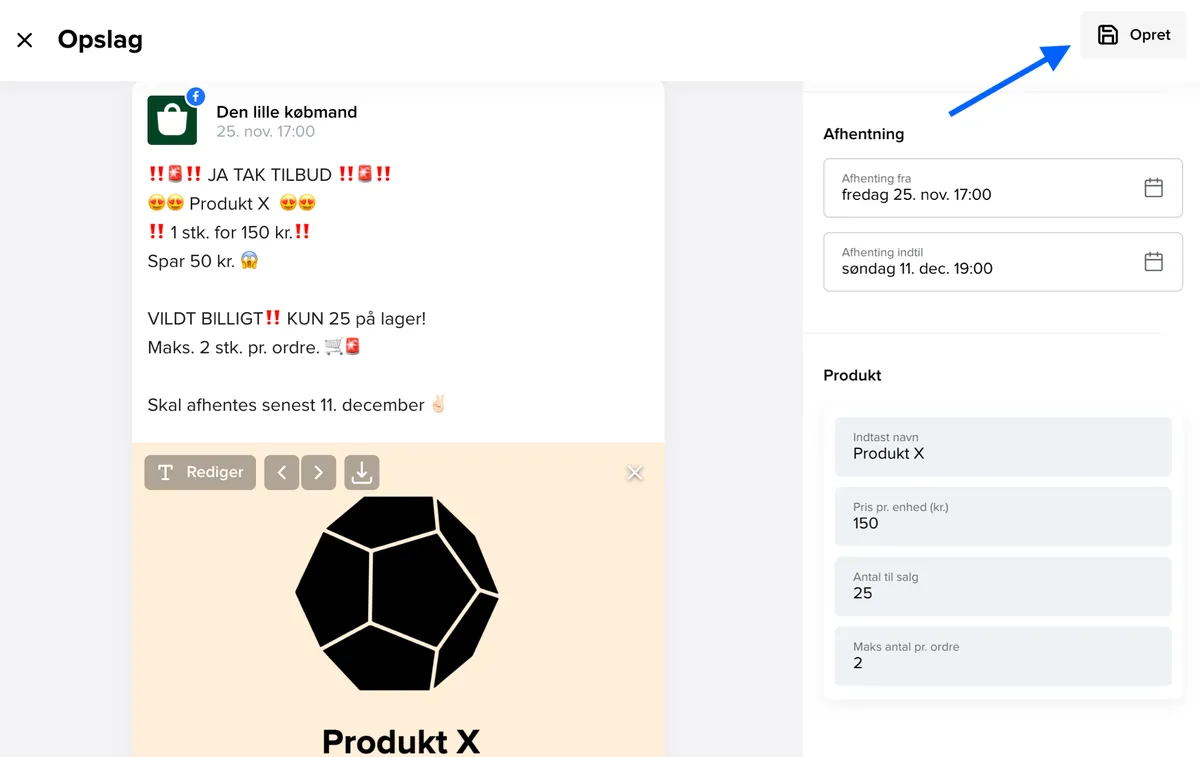
- 8Press create in the top right corner and let the post upload.
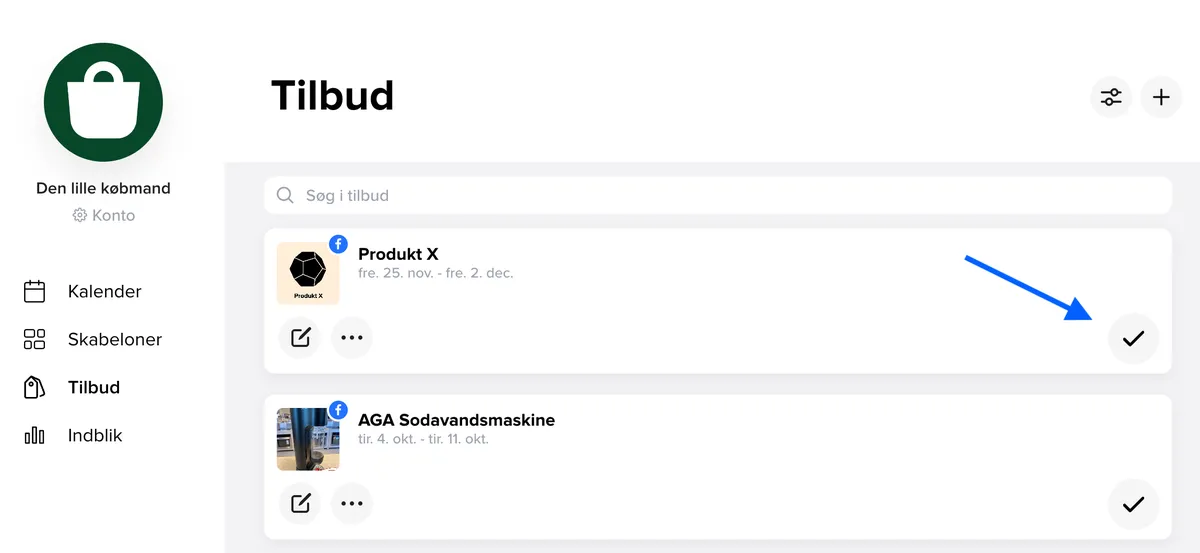
- 9Press the button with the checkmark to approve the post.
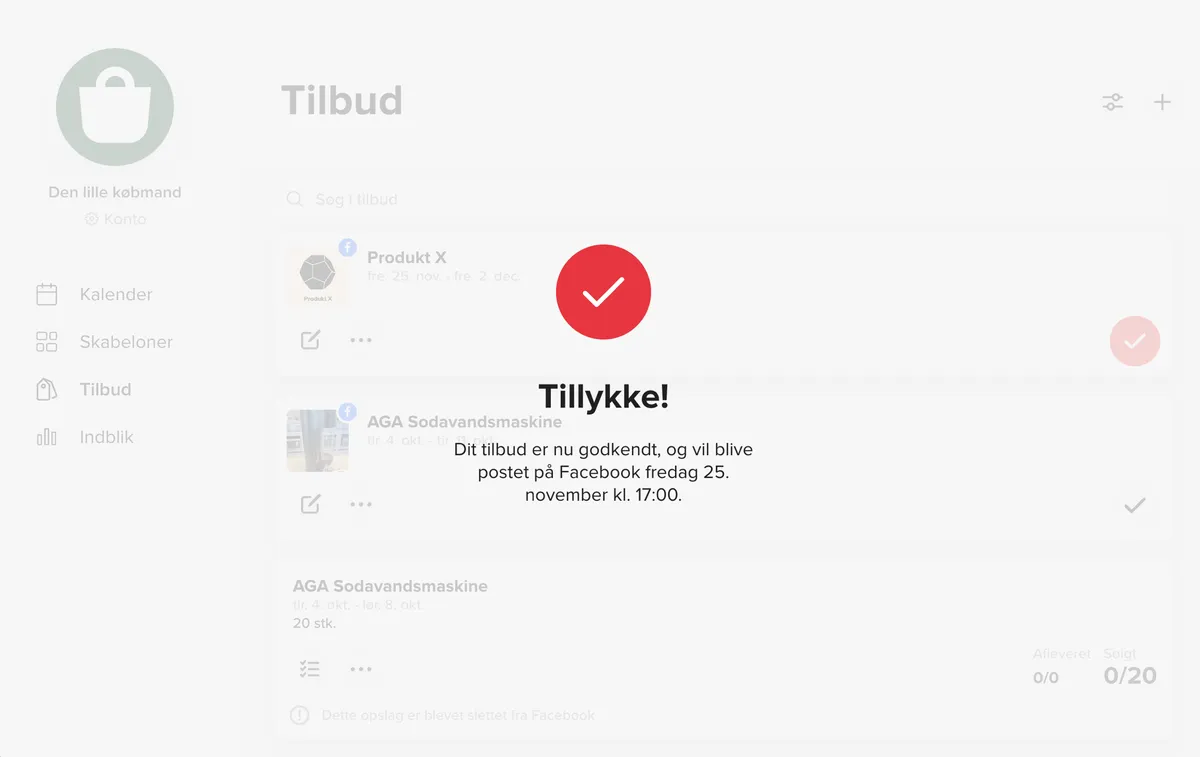
- 10Your Sales post is now approved and will be published on the specified date and time.
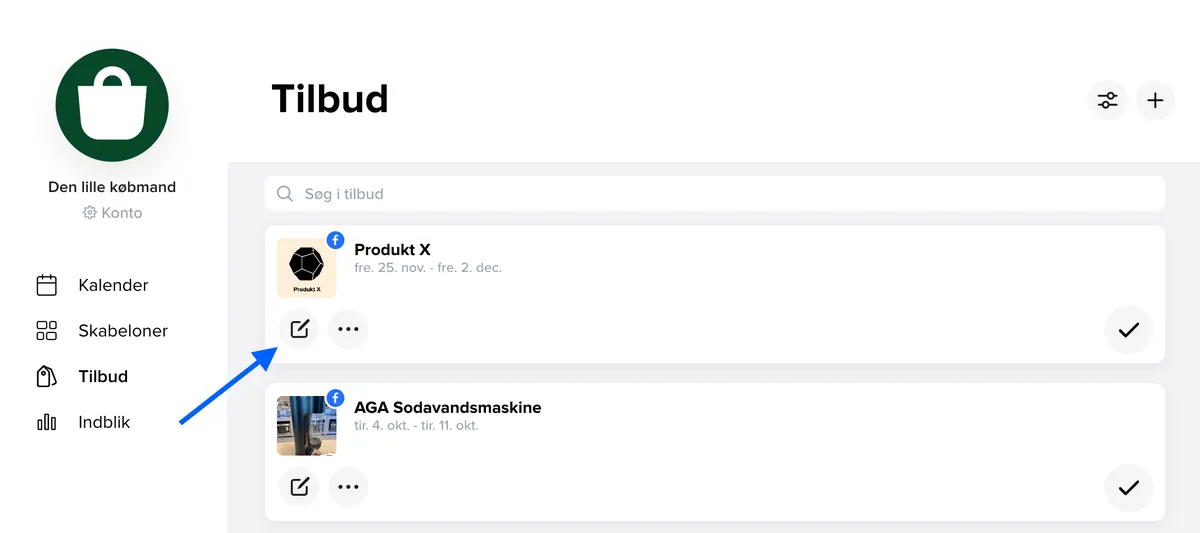
- 11Until this time, you can always remove your approval by clicking the red checkmark. This gives you the option to edit the post by clicking the pen icon. Just remember to approve the post again after editing, so the checkmark is red.
- 12See how to edit a published Sales post here.